
Web
The Thinkwise Web GUI is an ASP.NET application and runs on Microsoft Internet Information Services (IIS).
Deployment
To deploy the Thinkwise Web GUI to IIS, copy the GUI files to the web server.
The default website directory of ISS for web applications is C:\inetpub\wwwroot.
It is advised that the GUI folder is given the name of the application. That way, various GUIs can easily be kept separate from each other.
Set up application pool
The Web GUI runs under a .NET v4.5 application pool and requires .NET v4.7.2 to be installed. The web application can be started, stopped and restarted via the application pool, with the application being able to gain access to the disk and potentially also to the database. It is advised that each application has its own application pool made for it.
Ensure that the Application Pool Identity has the right to read files in this directory. The Application Pool
Identity likewise needs permission to write on the Cache and App_data directory in the Web GUI. If these
directories do not yet exist, they can be created in the application's folder. The Cache directory is used to store a
user's model in order to speed up the log-in process. The App_data directory is used by the file upload control and
the preview component to temporarily store files.
To verify the permissions, check whether there are files in the
Cachefolder after logging in.
The rights can be altered by right-clicking the directory in the security tab.
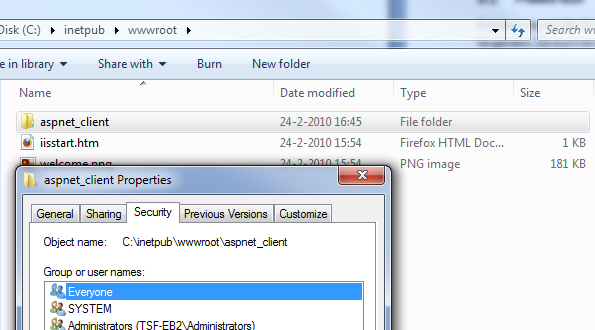 Security properties of a folder
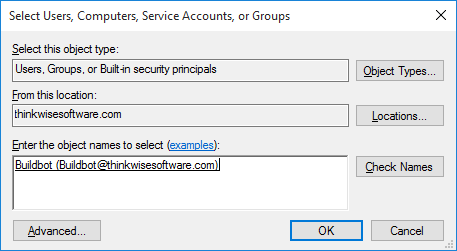
If the application pool runs under an Active Directory user, the user will be selected from the domain:
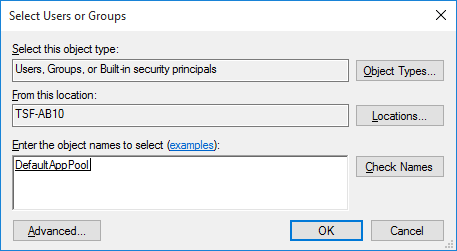
If a built-in application pool is used, the location needs to be that of the current machine. The application pool user
is then IIS AppPool\[name]:
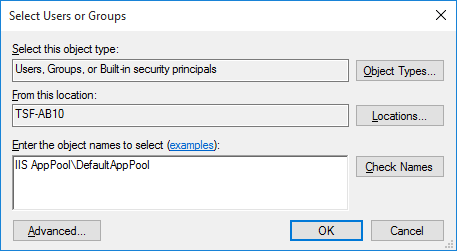
After checking the name, it is recognized.
Add application
The application's directory set up on the web server in C:\inetpub\wwwroot or a similar location can now be found in
the IIS Manager as a virtual directory.
This virtual directory needs to be converted to an application. By right-clicking the directory, it is possible to convert these into an application. A dialogue will appear in which the name, the location of the GUI directory and the application pool can be specified.
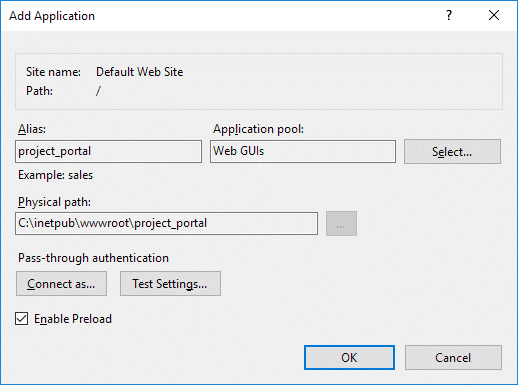 Add Application
In the Alias field, the web application can be provided with a name. The alias will be used in the URL of a web server. The local URL of IIS is:
http://localhost/. The application will be accessible via:http://localhost/[application_name].With Application Pool, choose the pool that has been created for this application.
With the buttons for Connect As and Test Settings, it can be tested whether the rights on the application directory for the various accounts have been correctly established.
Turn Enable Preload on if this option is available. More information is available here.
Now that the web application has been applied to IIS, the GUI can be opened via the browser. For this, open a local
browser and go to http://localhost/[application_name]. Now, the log-in page of
the GUI will appear in the browser. The next step is to configure the application so that it is also possible to log in.
Configuration
settings.ini
After the GUI has been applied to IIS, it can be set up by modifying the configuration file. That way, the GUI will know where
the meta model must be loaded from and where the data of the customer has been saved. The configuration file is in the root of the
GUI folder and is called settings.ini.
After changing the settings, it is necessary to restart the Application Pool.
Authentication
The Web GUI offers various possibilities in the field of authentication and password management for which extra settings are needed. This concerns:
- IAM authentication
- Logging in with an e-mail address
- Changing and setting a password
In order to make these functions possible from the Web GUI, the GUI needs to have a database service account with which the user can be validated to log in.
Contrary to versions 2018.2 and earlier, the service account should not be created as a user in IAM. The service account only needs full access to all the databases present in IAM, including the IAM database itself. None of the end users accessing the applications require any physical permissions on any database. Users using RDBMS authentication do need to be created since they will be authenticated by attempting to open a connection to the meta-database.
The service account can be configured in the web.config file of the application, the settings.ini file or to use the Application Pool Identity.
web.config
Add the following line to the connectionStrings section in the web.config or machine.config:
<add name="TsfGlobalUser" connectionString="User ID=myUser;password=myUserPassword" />
Sensitive information in the web.config file, like connection strings and passwords, can be encrypted using
Protected Configuration.
This way, only the Web GUI will be able to decrypt the information in the web.config file.
To encrypt a configuration section of the web.config file, use the aspnet_regiis.exe tool with the -pe option and the name of the configuration element to be encrypted.
- Open an administrator command window in the
inetpub\wwwrootfolder. - Execute the following command to encrypt the
connectionStringssection of theweb.configfile:
C:\Windows\Microsoft.NET\Framework64\v4.0.30319\aspnet_regiis.exe -pe "connectionStrings" -app "/myApplication"
settings.ini
The GlobalUser and GlobalUserPassword parameters in settings.ini.
This means of storage is not secure because the account details are saved as plain text on the web server. Only use this for testing purposes.
Application Pool
The Application Pool Identity of the application in IIS (with regard to Windows authentication) is used.
IAM Authentication
IAM authentication is meant to simplify the management of large numbers of IAM users. IAM Authentication users are only registered in IAM and not on the database. When logging in, the account details are validated with IAM.
The Web GUI uses the provided IAM account to connect the end product databases for all
IAM Authentication users. Therefor, always use the provided tsf_user() function to retrieve the username from within SQL logic,
instead of the functions provided by the RDBMS.
Passwords
An initial password for IAM authenticated users can be set using the Change password task in IAM. There is also the option
of letting the users set up a password themselves upon logging in for the first time, by redirecting the user to
the following link: https://[url]/[application]/ResetPassword.aspx.
To change the password for RDBMS user, the service account must have alter login rights on the database server.
In order to set the password, the GUI uses email functionality to ensure that the user who wants to set up the password is the valid user. During this procedure, a Validation code is sent to the user's e-mail address. The e-mail address can be registered to the user in IAM. Ideally, choose an e-mail address that no other users have access to.
SMTP
The GUI will send e-mails via an SMTP (Simple Mail Transport Protocol) server. Which SMTP server must be used can be specified via the settings.ini or IAM extended properties.
This concerns the following settings:
- SmtpServer
- SmtpPort (default port 25)
- SmtpEnableSsl (default is off)
- SmtpFrom (the from e-mail address)
- SmtpUser (optional)
- SmtpPassword (optional)
The account details for the SMTP server can also be stored encrypted in the web.config so that that account
details are not stored as plain text on the web server. See here for information about this.
The content of the e-mail is displayed in the language of the user. The translations can be overwritten per client project with the translations in the SF.
| Translation object | Default translation (English) | Parameter |
|---|---|---|
set_password_mail_subject | Set password: {0} | {0} - Title of the application. |
set_password_mail_body | We received a request that you want to set your password. In this mail we send you a code which you need to set a password. <br/><br/> <hr/>{0}<hr/><br/> Copy this code to the '<i>Validation code</i>' field in the application where you requested a new password. If you have closed the application already you need to request another code.<br/><br/> A <b>strong password</b> contains a minimum of 8 characters, numbers, lower and upper case letters, special characters and does not include any part of your username. | {0} - Validation code |
Logging in with e-mail
Users can also log in with an e-mail address in the Web GUI. The e-mail address of the user is registered in IAM. The GUI needs a general IAM account in order to connect the e-mail address to a user in IAM to log in.
ADFS
Using ADFS (Active Directory Federation Services) it is possible to make an AD domain controller available in a secure way outside your own network. A web environment, in which the Web GUI has been made available, is made available on the internet via the DMZ. More information about this (as well as the setting up of it) is available here.
Integrated Security
The Web GUI supports Integrated Security. Domain users can log in on the Web GUI with it without entering credentials. How this has to be set up is explained here.
Google Maps API key
If a Google Maps control is used in the application, it is necessary to request a Google Maps API code from Google in order to correctly display the map. This code can be requested for the URL from the application. A Google account is needed to make such a request.
To request a key, go to https://console.developers.google.com/apis and log in with your Google account. The gmapapikey parameter can be used to set up the requested API Key for the Web GUI. The same code can also be used for any other application on this URL.
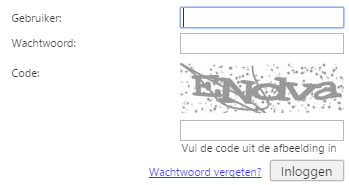
Captcha
Hackers can use a brute force attack to guess a user's password. In order to prevent them from trying various passwords back-to-back, a captcha can be used at log in so that the log in process is delayed.
 Captcha
Use the LoginCaptchaNoise and ResetPasswordCaptchaNoise extended properties to enable the Captcha for login and password reset.
Session timeout
The Web GUI has a mechanism that tells the web server every five minutes whether the user is still active (as long as the tab is open). With this, the Session timeout of IIS is unnecessary.
This interval can be configured for the Web GUI via the KeepAliveSession extended property. A value of 0 or lower will deactivate this function.
More information about the setting up of the Session Timeout of IIS can be found here.
Server/Database information
Within the application, standard information is displayed to the user about which project is connected and on which server. This happens, for example, on the log-in page and on the start tab of the ribbon.
This information can be hidden via the ShowLoginInfo extended property.
Performance
Warm-up application
A known problem for ASP.NET applications is that the first request takes longer before the page is available for the user. This occurs if the application has been unused or after a recycling of the IIS Application Pool.
How Application Initialization can be applied on the Application is described here.
The Web GUI contains a Bootstrap.ashx page, which simulates the logging in of a user. This page runs the log-in process to IAM. Furthermore, components of the application that are used from the main page of the GUI are pre-prepared, such as Crystal Reports reports, components etc. The general IAM user that can be saved to the GUI is used to log in.
By adding the following rules in the web.config file in the system.webServer> section, this page is requested after
recycling the Application Pool.
<system.webServer>
   <applicationInitialization
      doAppInitAfterRestart="true"
      skipManagedModules="true"
      remapManagedRequestsTo="startup.htm">
      <add initializationPage="/Bootstrap.aspx"/>
   </applicationInitialization>
</system.webServer>
The RemapManagedRequestsTo specifies an HTML page to display during the recycling of the Application Pool.
For more information about this IIS feature: http://www.iis.net/learn/get-started/whats-new-in-iis-8/iis-80-application-initialization
Caution: changing the
web.configfile causes the application to reload.
Troubleshooting
Images are missing
If the GUI icons and images used are stored on a network location, then the paths of the files must use UNC paths. For
example, //everest/data instead of S:\.
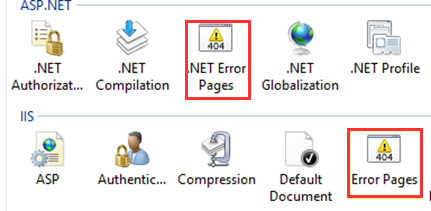
Custom error pages are not displayed
The Web GUI supplies as number of custom error pages to deal with error messages and invalid requests. If these pages are not displayed correctly, IIS needs to be configured to make it work.
 Default IIS error page instead of the Thinkwise error page
Enter the following command in CMD for this:
%windir%\System32\inetsrv\appcmd unlock config -section:system.webserver/httperrors
To display the error pages for URLs ending in one or more .:
- Download and install the URL Rewrite module if it is not available
- Add the following URL Rewrite rules to the
web.configof the server or the application, so that it works for all of the applications and that the GUI can continue to update.
<rewrite>
  <rules>
    <rule name="Remove Trailing Dots after some text" stopProcessing="true">
      <match url="^(.*[^.])\.+$" />
      <action type="Rewrite" url="{R:1}" />
    </rule>
    <rule name="Remove All Dots" stopProcessing="true">
      <match url="^\.+$" />
      <action type="Rewrite" url="/" />
    </rule>
  </rules>
</rewrite>
When configured correctly, a proper page will be displayed for all errors and unknown URLs of the application which fits in with the rest of the application.
The error messages will be displayed to the user on the CustomError.aspx page. In end user mode, only the notification
An error has occurred will appear. This happens when a serious error occurs whereupon the work cannot be
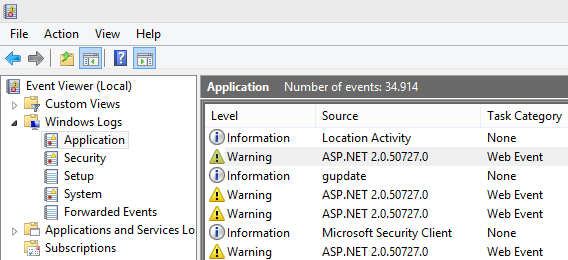
restarted. To acquire more information about an error message, you can execute the GUI in Developer mode and repeat
the reproduction steps or look it up in the Windows Event Viewer under Windows Logs > Application.
 Overview of error messages
For 404 errors, the Web GUI displays a FileNotFound page.
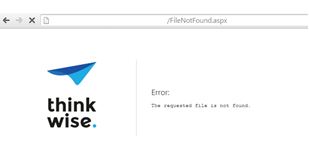 FileNotFound message
For a full list of HTTP error codes, see https://nl.wikipedia.org/wiki/Lijst_van_HTTP-statuscodes.
When adding your own error pages, please note that there are two sorts of error pages, depending on the URL.
Database connection with DB2 does not work
See here.
Crystal Reports
See here.