
Roles
Roles can be regarded as distinct tasks or activities of an application. It is important for the developer to closely assess these features so that there is no overlap in rights between different roles. Furthermore, the nomenclature of the roles must be clear for IAM administrators responsible for setting up the authorization of an application using these roles. They have no knowledge of the functionality and therefore have to deduce the purpose of the roles from the role names. Roles are often named after the corresponding activity, such as Approve hours or Report a ticket.
Role rights
Roles can be added or modified using the Role rights screen. After selecting a project version, it is possible to create new roles or to copy existing roles from a previous project version or import roles from another Intelligent Application Manager (e.g., to copy role rights from an acceptance environment to the production environment).
Copy roles
When a new project version is synchronized in the Intelligent Application Manager, for which an earlier version has already been configured, most of the roles of the previous version can be reused. This is done with the Copy roles task.
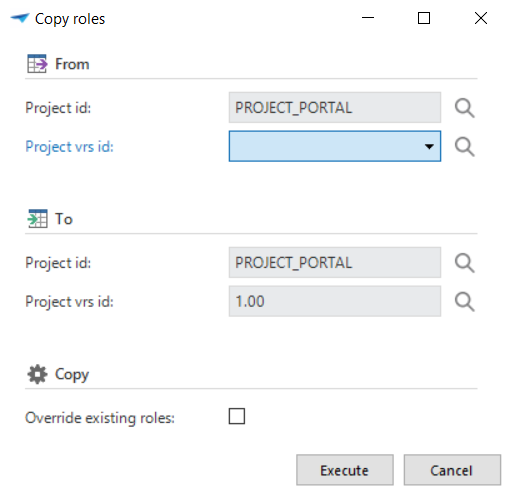 Copy roles task
Import roles
When use is made of different IAMs, for example for a DTAP environment, it is possible to copy the roles created in one IAM to another IAM using the Import roles task. It is also possible to save this import to disk, for example to copy the roles to an IAM that is not directly accessible.
Any existing roles with the same name as imported roles are overwritten.
Create roles
To create a new role, click the Add button on the Role's tab page. Add a name and description to the role and click Save.
Only use the All rights option for the administrator role. All other roles should provide a minimum set of rights required for the corresponding task or feature.
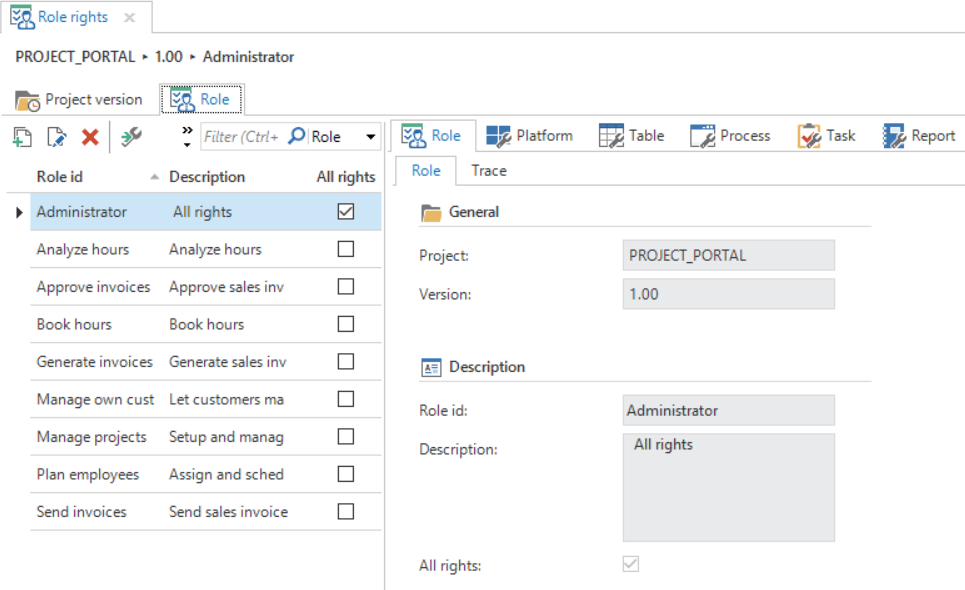 Create a role
Setup
Once a role has been created, it can be set up using the tab pages on the right.
 Role rights
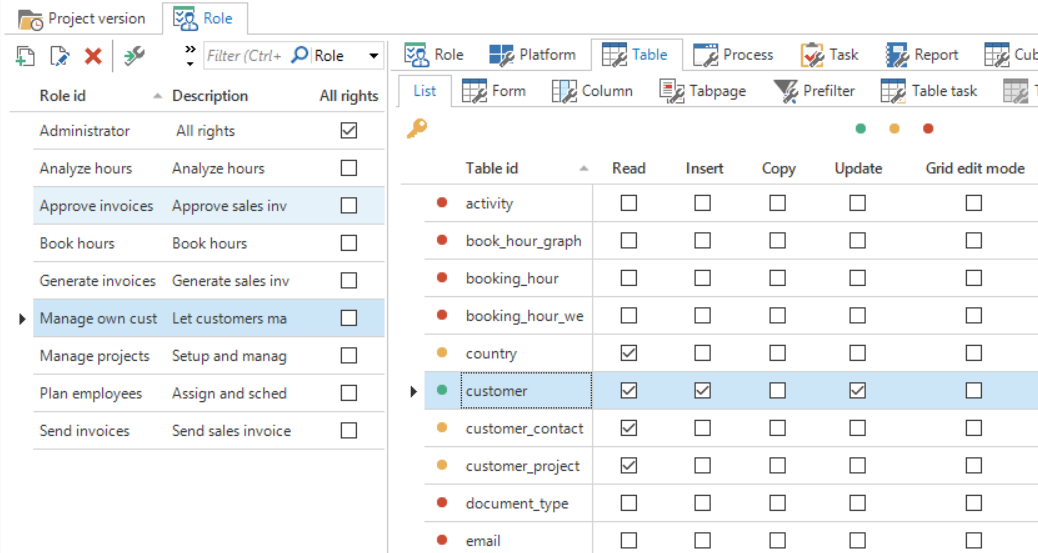
To assign rights to a role, select the required objects and click the Assign rights task. Select a preset or check the rights you want to assign to the object.
The Assign rights task also provides the option to assign rights to any child objects, for example the columns and details of a table, and to the parent objects required for this object, for example a task for its task parameters.
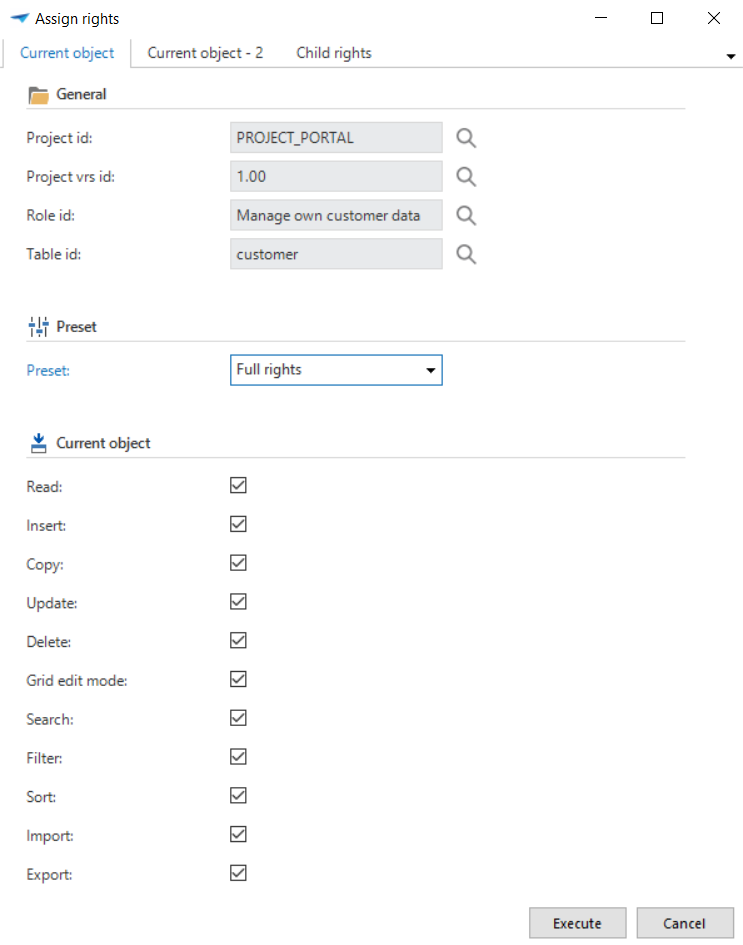 Assign rights task
The Available checkbox, visible in the grid for certain objects, indicates if the rights are granted to the required parent objects. The green, yellow and red icons indicate the resolved rights of an object, based on the granted rights and the availability.
Apply roles to the database
After modifying roles, execute the Apply roles to database task on the Project version tab page to create the defined roles on the database. This is only required for users with database or Windows authentication.
Model rights
The Model rights screen also allows for rights to be assigned to roles from a model perspective. Using the Model tab page you can select a model object and grant rights for this object to multiple roles.
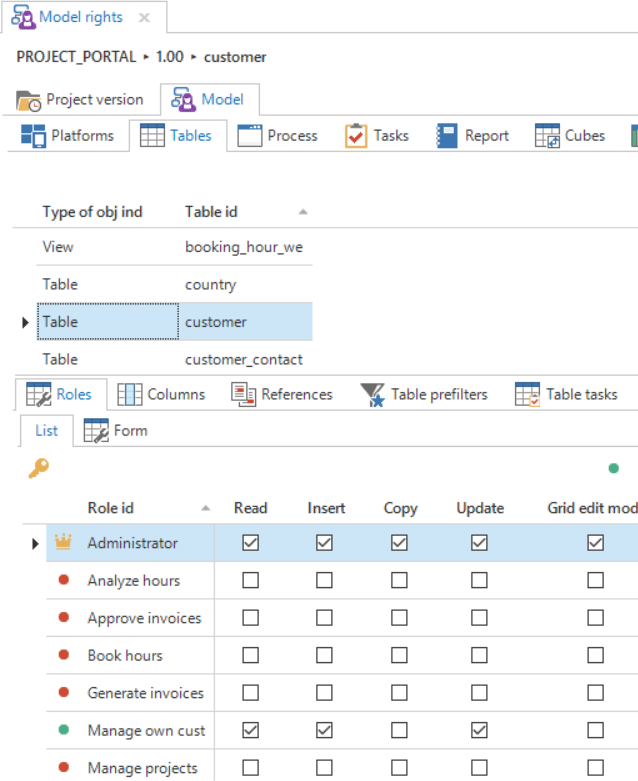 Model rights
New objects
The New objects tab page shows the objects that are new in this project version compared to a previous version. Use the Set previous version task to configure the version to compare with.
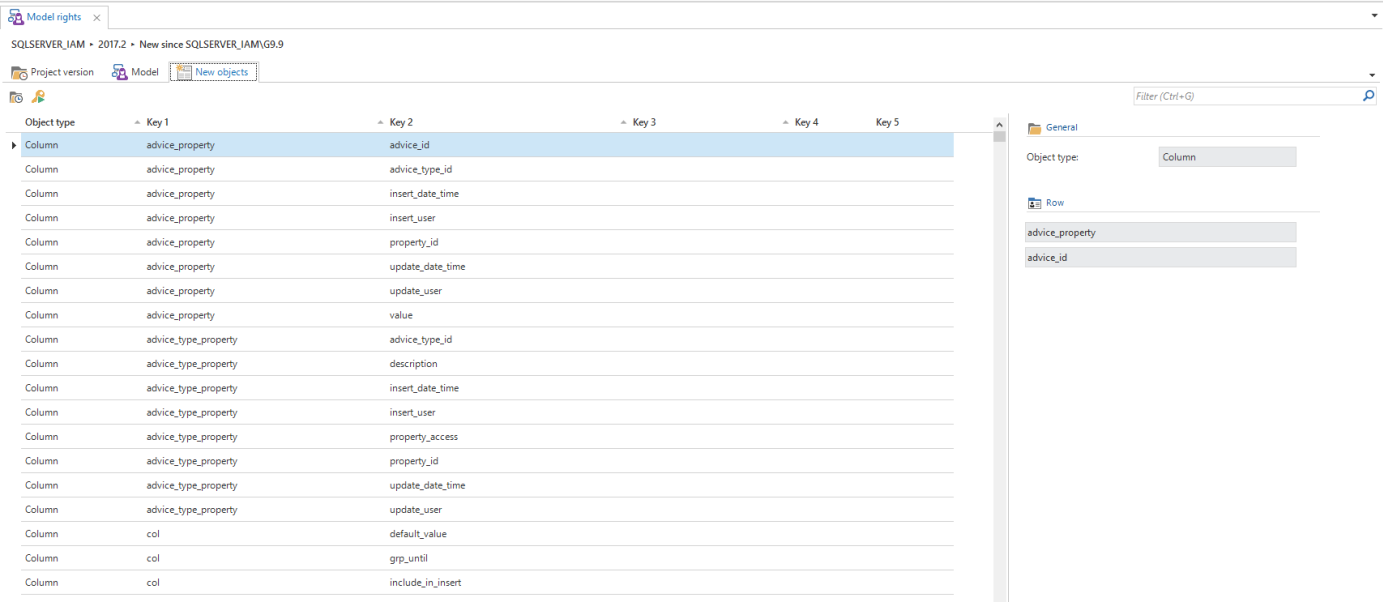 New objects
Click the Go to object task to find the selected object in the Model tab page. There you can assign the required rights for the object.