
Creation
The Creation screen allows you to easily deploy a new or updated version of your application. Creating and deploying an application requires a number of steps that are explained in the following paragraphs.
1. Generate definition
The first step is to generate the definition of your application. During this step, the application model is composed and extended using the defined generic concepts (for example, for trace functionality and logging) and the platform specific definition is created.
The following options can be set for the generation:
Include control procedures in development
Disable this option if control procedures that are not yet completed do not need to be included.
Delete generated specifications
Some objects (such as columns, tables and tasks) generate a check mark. These objects are deleted during the generation process and re-created. In addition, the program objects with items and parameters are deleted and created again.
Copy base projects
The data and information from the base projects will be copied into the current project.
Generate specifications
After the base projects have been copied, the dynamic and static control procedures are executed.
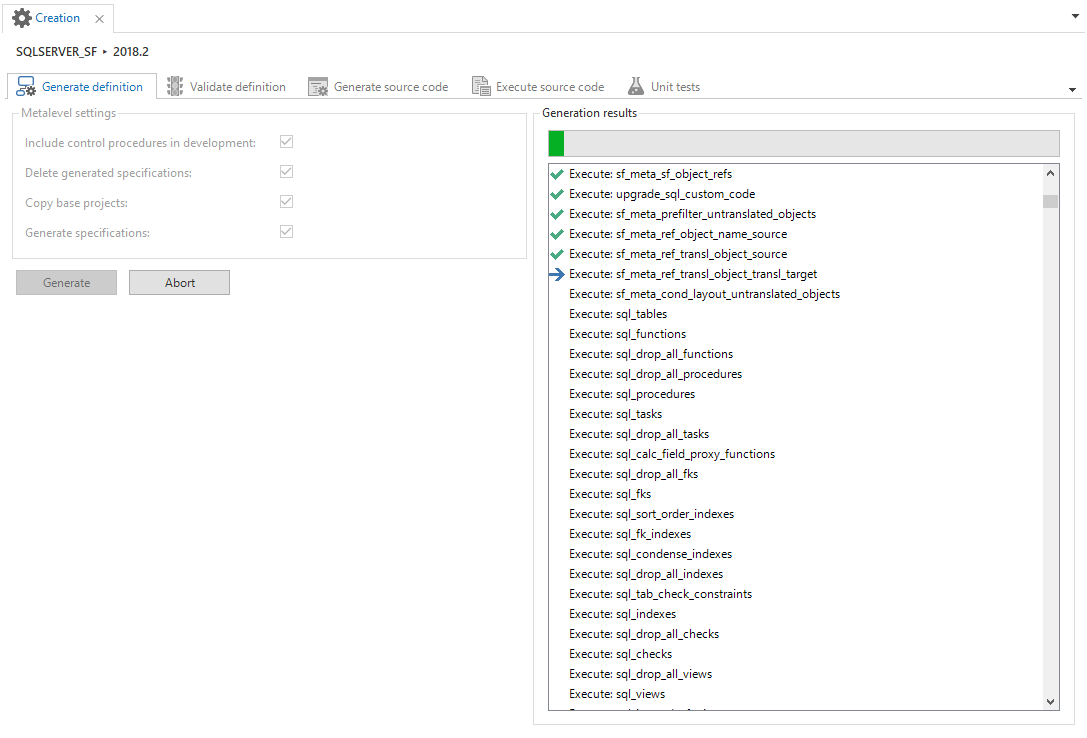 Generation definition
Only one generation for each project version can be carried out at the same time. This avoids conflicts during the generation. If during a generation a second generation is started, a message is displayed that the generation of the respective project version is locked.
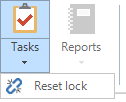
If desired, the project version lock can be removed via the Reset lock task in the ribbon or via the context menu.
2. Validate definition
After the generation, the definition must be validated. It is important that all validation messages of type Error are resolved before the source code is generated. If this requires modifications to the model, the definition generation must be executed again.
See Validation for more information about the validation.
3. Generate source code
After the definition has been generated and validated, the actual source code can be generated.
 Generate source code
The generated code is stored in the Software Factory. The code can also be written to disk:
- Write program objects to disk - The generated program objects are placed in the
.\Source_code\Program_objectsfolder. - Write code files to disk - The code files are written to the
\Source_code\Groupsfolder.
The code on the disk is not used when executing code files on the database from this screen. Changes to the code files on disk have no effect!
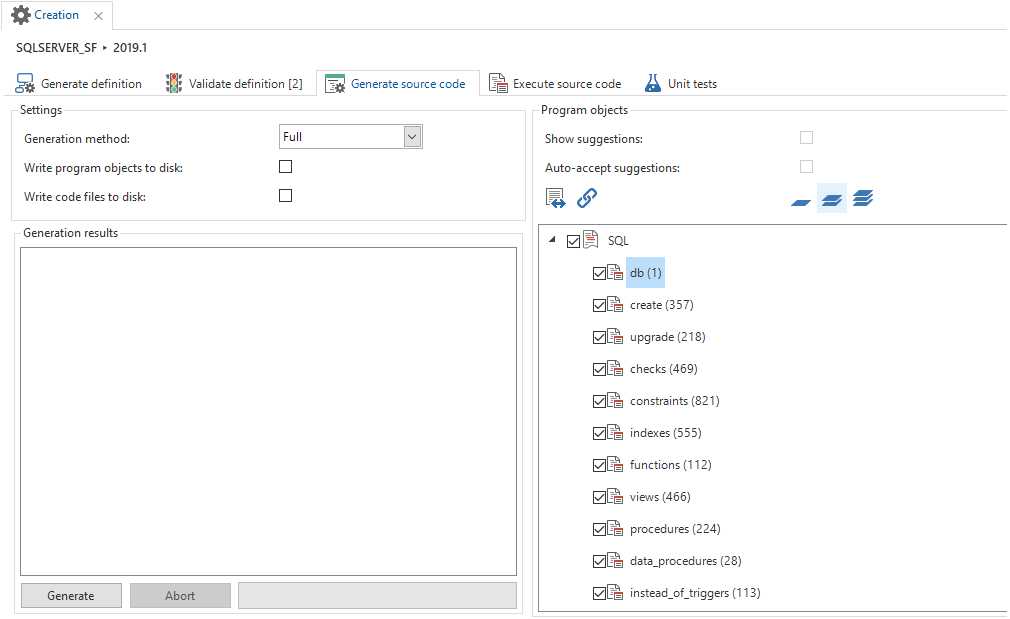
Generation method
There are three options for generating the code, depending on the situation.
Full
This option is desired when the end product database still has to be created or still has to be brought in line with the model, and the end product database does not correspond with a previous version of the model.
The program code of all the objects is assembled. Subsequently, all program objects are used to compile the code files.
All the database objects that are not defined in the model, for example, indexes and procedures, are removed.
Smart
With this option, only modified objects are reapplied to the database. However, this option can only be used when the end product database is the same as the previous version of the model. This is often the case when upgrading a production version. The smart way of generating significantly speeds up the upgrading process, for example because unmodified indexes are not rebuilt and it reduces the risk of an upgrade.
The program code of all the objects is assembled. An analysis is performed to determine which program objects are actually used during the compilation of the code files.
The condition for performing the analysis is that the program objects of the previous version of the model are available and compiled to code. This is because the analysis looks among other things at the modified code in program objects.
If you perform a smart upgrade, make sure that the previous version is fully generated. For example, generated objects may have been deleted during the implementation of a branch. These then appear as newly installed objects during the difference analysis.
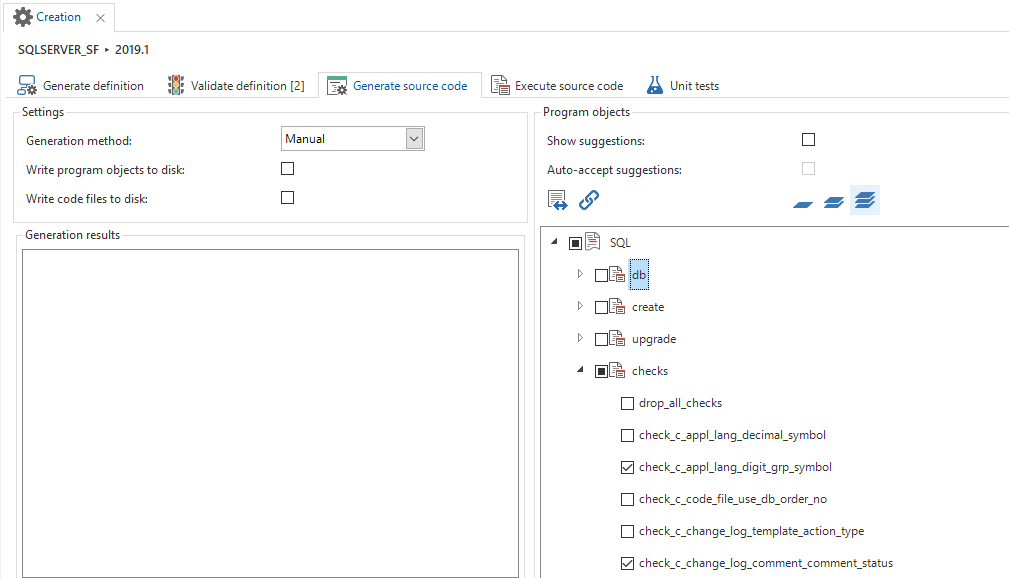
Manual
Manual generation can be applied when it is exactly clear what needs to be executed on the database. For example, during the development phase, when a view and all the associated logic have to be executed on a database.
A manual generation offers the opportunity to checkmark program objects that have to be executed. Only the checked program objects are used in the compilation of the code files.
It is possible to use the Smart generation first and subsequently expand or restrict the selection using Manual generation.
Program objects
The program objects' filters determine the level of detail where you can view and enable or disable the code. The most detailed level might cost some time to load, depending on the size of the model.
 Checking and unchecking components on manual generation
It is possible to group the tree with program objects for each model object. In this way, all code of a view or a table can quickly be executed.
When performing a manual upgrade of an individual table, pay attention to the program objects in the Other group, such as deleting dependent objects or renaming the old table.
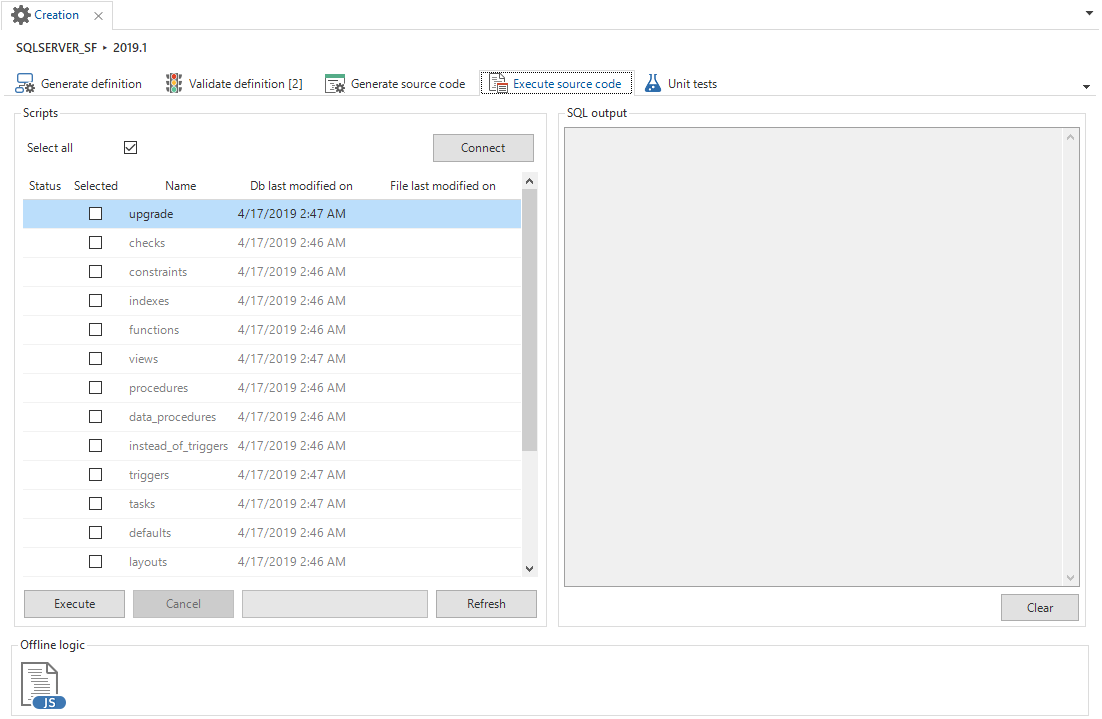
4. Execute source code
When all source code is generated, it must be deployed to the database. This is done in the Execute source code tab page. It is recommended to always make a backup of the end product before this step is executed.
To execute the code:
Connect to the server with the Connect button in the top right.
The required code files are checked by default after connecting. It is optionally possible to uncheck code files.
- The db code file is automatically checked if the database does not yet exist.
- The create code file is checked if the database does not exist or is empty. For example, when you connect to a manually created database on Azure SQL Database.
- The upgrade code file is automatically checked when the database exists and the product information in this database indicates that an upgrade should take place.
Execute the code by clicking the Execute button.
In order to effect any offline (JavaScript) logic, press the Offline logic button at the bottom.
 Execute source code
When the generation has been executed out and all code has been executed and/or compiled, the end product is ready to be used.
After the database has been created, no more data model modifications should be done in the current project version. A new version will have to be made for this.
Upgrade an existing database
When the model of a table is changed, the old table will be renamed and a new table will be created. The upgrade script ensures that the data is imported from the renamed table to the new table. Lastly, the (now superfluous) renamed table is deleted. Next, the business functionality is immediately reapplied.
When an existing database is upgraded, it is possible that not all data conforms to the (new) checks and constraints. To check the database, the base project SQLSERVER_VERIFICATION, DB2_VERIFICATION or ORACLE_VERIFICATION can be linked. After having carried out all of the steps again, an extra code file with controls will have been generated, which can be executed on the database.
5. Unit tests
After an upgrade, all unit tests can also be executed as a regression test. This to ensure that further changes have not broken any units that were already tested.
